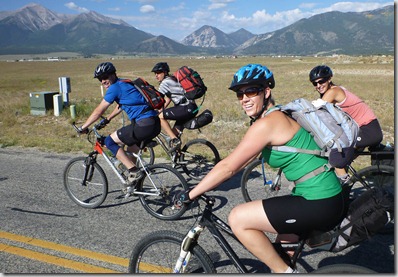
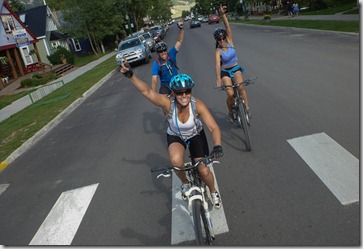
 Although the 2012 drought has been less than ideal for kayaking, the upshot has been that I’ve been able to get out on my mountain bike more this year than in the past several years combined. So when my good friend, Scott, suggested a Labor Day weekend bike trip from Buena Vista to Crested Butte, CO, I couldn’t refuse. Originally, he intended the trip to extend from Colorado Springs to Loma, CO (original route map) and to be self-supported (everyone carries all of their own gear), but things don’t always go as planned. Instead, the route encompassed just 3 days of biking on back roads, forest service roads, and single track, and support was provided by a sag wagon.
The BVCB team consisted of Scott, Dave, Mikelle, Carrie, and myself, all of whom had spent considerable time biking and kayaking in Buena Vista (BV) this year. So it was no surprise when all of us convened at Dave and Mikelle’s new house in BV—aka “Dalton Ranch”—on the Friday night before Labor Day in preparation of the BVCB trip. We departed BV by 9:30am on Saturday, 9/1/2012 with fresh legs and high expectations for the adventure before us. Over the course of the day, we passed by the Chalk Cliffs on the side of Mount Princeton, climbed in elevation, and took a respite from the rain in a creepy general store in the little ghost mining town of St Elmo. After the rain subsided, we made the final push up the steep, muddy road past countless ATV’s to a gorgeous campsite that Dave graciously found for us.
 The second day of the tour began with an immediate, steep climb up Tin Cup Pass followed by a rocky descent past hundreds of noisy ATVs to another ghost mining town, Tin Cup. From there, we continued down hill to Taylor Reservoir, then along its north shore, and finally up an endless 6 mile climb to another incredible camp that Dave located. On the third day, the morning treated us to a long downhill ride to our turn off to the singletrack trail known as Deadman’s Gulch. We chose to follow the Rosebud Trail which quickly ascended into alpine fields before intersecting the Deadman’s Gulch trail that switchbacked dozens of times through glades of aspen trees on a steep hillside. After the adventurous singletrack, we found ourselves on a 7 mile dirt road descent that finally led to another 7 mile slog into the wind along Highway 135 into Crested Butte. We arrived 3 days and 90 miles after we left BV and immediately celebrated with pizza and beer at a hole-in-the-wall joint where we reveled over our accomplishments, reminisced about the wonderful times we had, and planned our next biking exploits. Without a doubt, there will be a sequel to this story…
I’m sure that you want to check out the photos and maps, so here they are. But if you want to hear a little bit more about the geeky side of this trip, keep reading below!
If you have spent any time reading my stories on this site, you know that I can’t leave home without an arsenal of gadgets that help me tell my stories and this adventure was no different. By some measures, I was traveling light on gadgets, but nonetheless, I had a GPS and SPOT mounted to my handlebars for location recording and real time broadcasting of our location. There was also a portable, waterproof sound system (ECO Extreme) with my iPhone safely encased on my handlebars that cranked out tunes for all of the long climbs along the trip. And finally, I tested out a small solar panel system by Goal Zero that powered the GPS and charged a battery pack. Overall, the gadgets performed beautifully, although they made my bike a bit cumbersome to handle on the tight singletrack trails.
So what did all of these gadgets actually do? Well, the SPOT provided real time tracking of our location every 10 minutes which was displayed at this Spotwalla webpage, and allowed me to check in on Facebook with our status even when we were far out of cell phone range. While this may have not been critical for this trip, the ability to practice with the device and know that it had its “SOS” capabilities made it worth carrying and using. The GPS provided our cumulative distance, elevation, and speed to evaluate our progress during the trip, and it also recorded a track log and waypoints for post-trip analysis. The simplest form of our track and waypoints is contained with the BVCB GPX file that I created, but for the less initiated, I also uploaded our route to my Garmin Connect site and a new site called Garmin Adventures. One of the cool features of the Garmin Adventures site is that it allows for photos and videos to be included along with the map in a format that other users can download to their PC or GPS.
Of course, I also had my little waterproof Panasonic DMC-TS3 camera along for the ride and managed to snap about 200 photos which provided a perfect excuse to start learning to use Adobe Lightroom. The great thing about Lightroom is that it consolidates tasks that I have previously accomplished via several tools into a single, professional-grade piece of software. After importing the photos, I was able to review, rate, select, and make adjustments on the photos. Finally, I was able to create “collections” of photos that I was able to use to create photo galleries for the web and publish to Facebook. So far I am extremely happy with this new addition to my digital life!
